
Running a website has become easier over time, but the amount of data a website collects nowadays is staggering. As such, many site owners must create a new MySQL Database to hold all that data.
In many cases, site owners will store specific data in one database for better organization. In other cases, it is to improve performance as it is easier to process a smaller database than a larger one.
Regardless of your reason, you can easily create a new database in WordPress using the cPanel’s Database Wizard tool.
When To Create A New Database?
While there is no set right or wrong time to make a new database, the consensus is to make a database contain one type of data or data that is adjacent (closely related) to each other.
For example, let’s say you make a database for all of your newsletter accounts. This will hold the user data for each subscriber. While this won’t be necessary at first, larger newsletters that have thousands of subscribers contain a lot of data.
Having it all accessible in a single backup is far more convenient when you need to access that data quickly. It also gives you more control over what content is being backed up at any given time.
The other time you may want to create a new database is when a database gets too large.
While this will vary between hosting environments, larger databases will lead to longer query times, which means your requests will take longer to load. As a result, your site will slow down, which can negatively impact your SEO.
How to Create A New MySQL Database
Creating a new MySQL database in WordPress is rather easy. To do this, you will first need to log into your web hosting account, access the cPanel, and use the Database Wizard to create one.
This is a rather simple process and will only take a minute or two at most. By the end of this tutorial, you will have a new database that is ready to be used for whatever you need.
Step 1: Access the Database Wizard
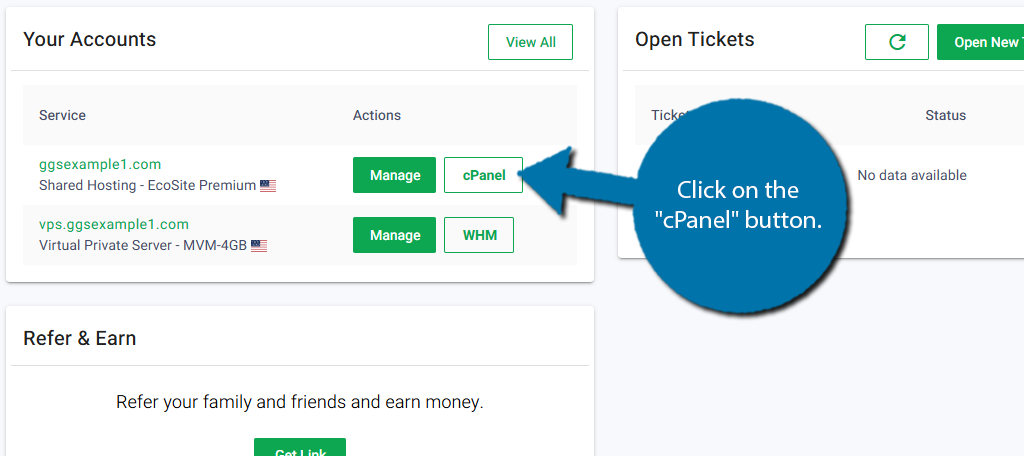
Log in to your web hosting account. Click on the “cPanel” button.
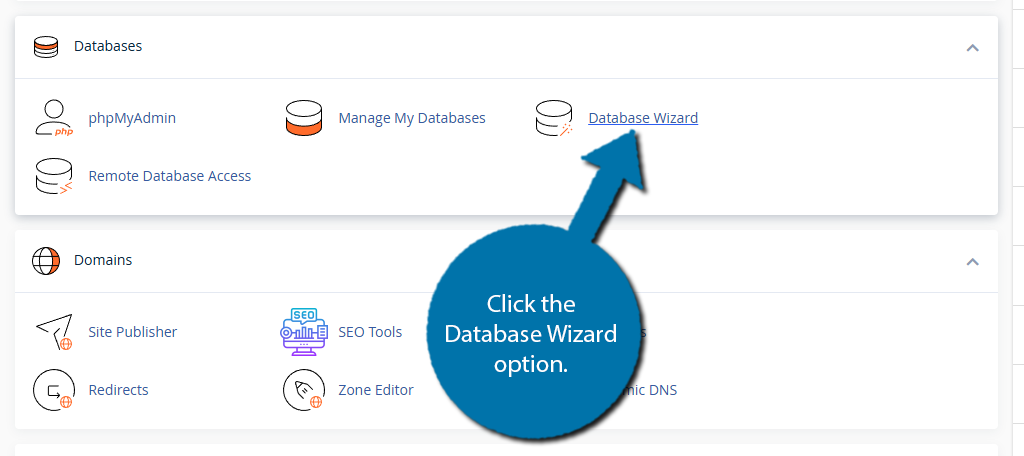
Scroll down to the Databases section and click the Database Wizard option.
Step 2: Create A New MySQL Database
The database wizard is extremely simple to use and only requires a few inputs from you. The first step is to name your database. Each database name will always start with your domain name as the prefix.
For example, if your domain name was “ggexample” the prefix will be “ggexample_” which you cannot change. However, what comes past that prefix can be changed. Simply enter the desired name into the available textbox.
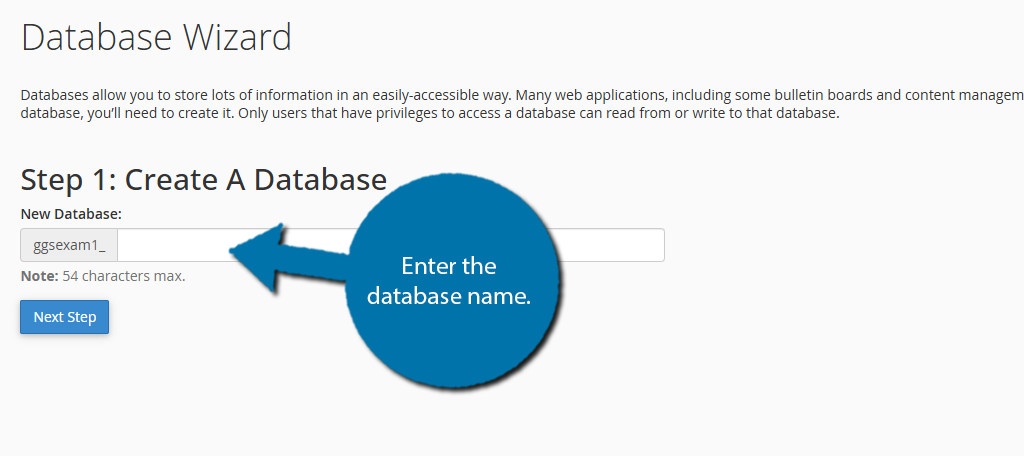
Click the “Next Step” button.
The second step is to create a new user for the database. This user will be able to access and manipulate the data stored within that database based on the permissions granted.
Simply enter the desired user name into the box (it will also have the domain name as a prefix). Below it, you must create a strong password for the account. The system will not accept a weak password.
You can also use the “Generate Password” button to have the system make one for you. This is the best option if you are using a password manager that will store it for you, as the generated passwords are nearly impossible to remember.
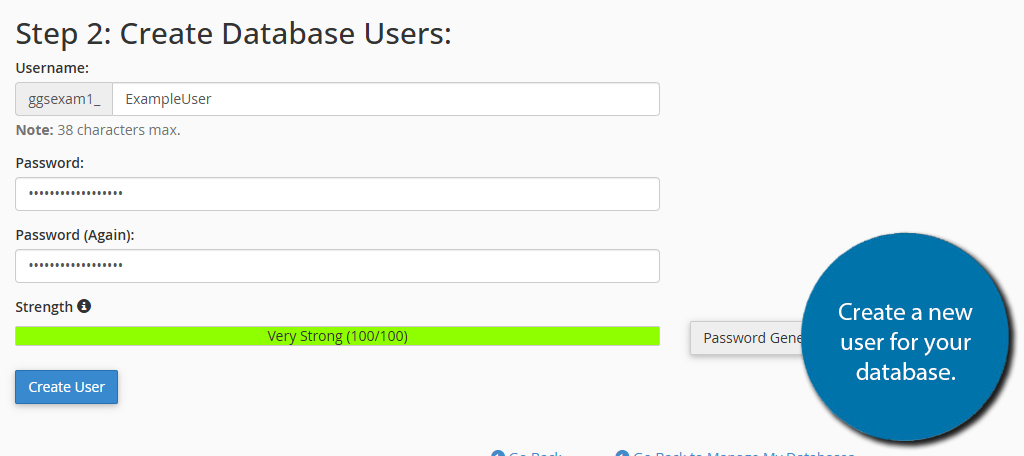
Click the “Create User” button to continue.
The next step is to add permission to the user we just created. While you can go through each option individually, save time by selecting the “All Privileges” option at the top. This will allow the user to do anything with the data within the database.
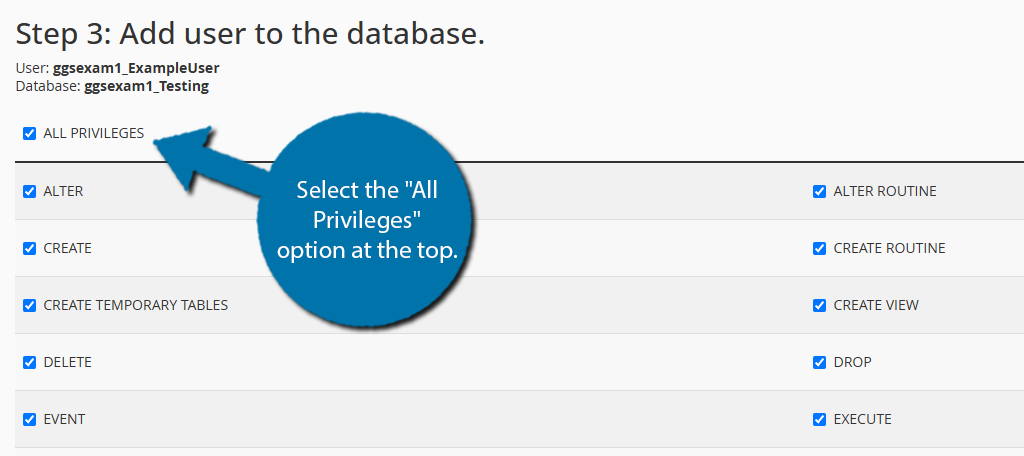
Once done, scroll down to the bottom and click the “Next Step” button to finish.
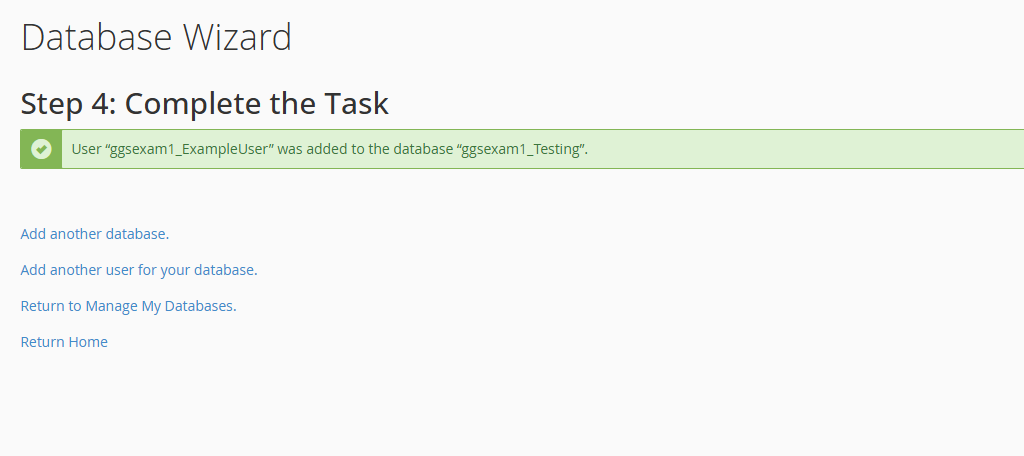
This concludes the Database wizard. You should now see a green message informing you that the user you just created was added to the database you just created.
Step 3: Managing MySQL Databases and Users
You will undoubtedly need to manage your databases and their respective users. Luckily, this is also quite easy, so I’ll do a brief overview.
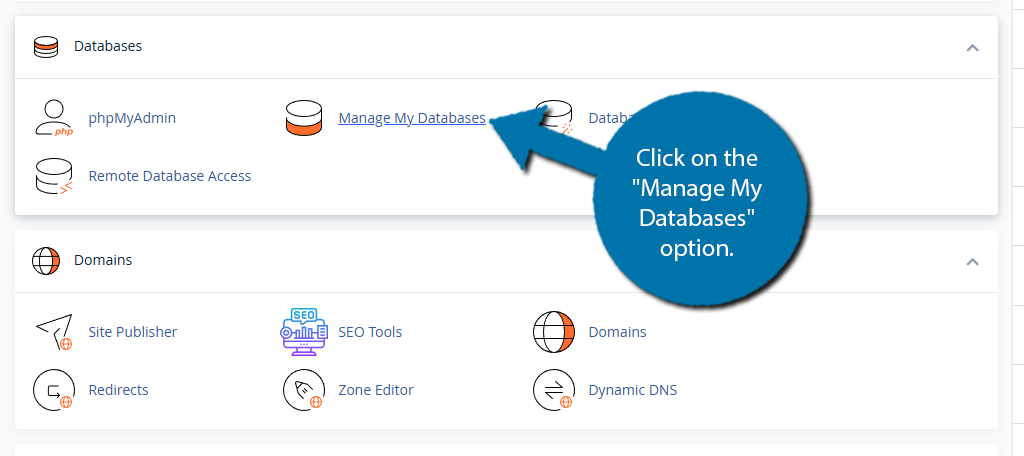
Return to the cPanel and scroll back to the Databases section. This time, click on the “Manage My Databases” option.
This will pull up a list of your current databases and their respective users. To edit the database, you can use the rename or delete options in the Actions column.
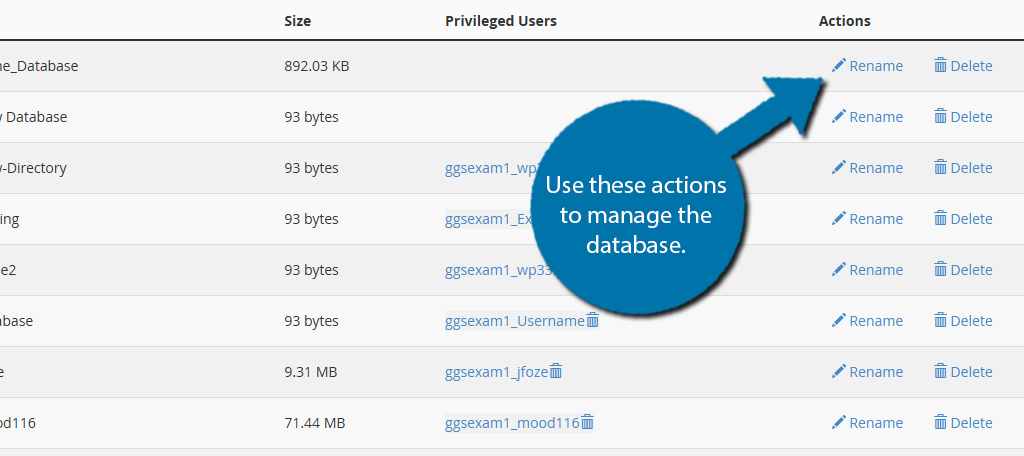
If you wish to edit the user, look for the Privileged Users column and click the username to edit it. Here, you can adjust the permissions that the account has. You can also use the trash can icon next to the name to delete it.

And that’s it when it comes to creating and managing your new MySQL database in WordPress.
MySQL Database FAQ
Yes. Several plugins allow you to import and export databases in just a few clicks. You can often find these features within backup plugins that give you the option to store your backups in locations off your server.
In some cases, there is. WordPress itself does not set these limitations. Instead, the number of databases you can have is determined by your web host. As such, refer to their documentation on the subject.
Yes, but it is not easy. One of the main alternatives to MySQL databases in WordPress is MariaDB. However, you will need advanced knowledge to make this transition work, as well as a web host that supports them.
Yes. Whenever you create a backup for your site, nearly everything that is backed up is contained within the databases. As such, the databases themselves are backed up. You can easily back up a database individually.
You’ll need to access phpMyAdmin and open up the database you want to view. You can not only view the data but also perform searches to find exactly what you are looking for. This is also where you would go to edit the data.
Yes. In some cases, certain plugins will create a unique database by default to store plugin data. However, if you can avoid using a plugin, that is often the better option to keep your site as fast as possible.
Yes. Not only are these databases a security risk, but they also take up valuable space on your web server. If you are not currently using a database, back it up and delete it. You can always add it back if needed.
Only Add What You Need
As you can see, creating a new MySQL Database in WordPress is easy. Anyone can do it in a matter of minutes. Be sure to only create what you need and to delete older databases that are no longer required.
The reason for this is that those older databases that are not regularly updated are prime targets for hackers to place malicious code or store backdoors in if your site is compromised. As such, only add what you need.
Why did you want to add a new MySQL database in WordPress? Did you find the database wizard easy to use?